How to access Home Assistant Core from outside using Cloudflare Tunnel via Synology Docker
If you want to access your Home Assistant from outside without subscribing to Nabu Casa, here is a solution for you using Cloudflare Tunnel. This method is simpler than DDNS + Port Forwarding method which I used many years ago. These are the plus points of this method...
- It's totally free!
- No need public IP from your ISP. It can work behind CGNAT.
- No need to open any ports in your router.
- No need to go through the complicated process of installing SSL certificate. URL already pre-configured with HTTPS.
If your Home Assistant was installed using Home Assistant Operating System method, then you can directly refer to this excellent video guide on how to enable remote access to your Home Assistant using Cloudflare.
However, if your Home Assistant was installed using other methods such as using Docker on a Synology NAS like me, then the above guide is not suitable because the Add-ons are not available in your Home Assistant. So here is the guide on how to achieve the same thing using Docker, or specifically Docker via Synology GUI.
1. Get a domain name
You will need a domain name. You can either register a domain name or get one of those free domain names. I personally have more confidence in a paid domain name. From my experience, free domain names don't usually last forever. You may suddenly lose the free domain name for no reason.
2. Register Cloudflare account
Once you get your domain name, you can now register Cloudflare account for free.
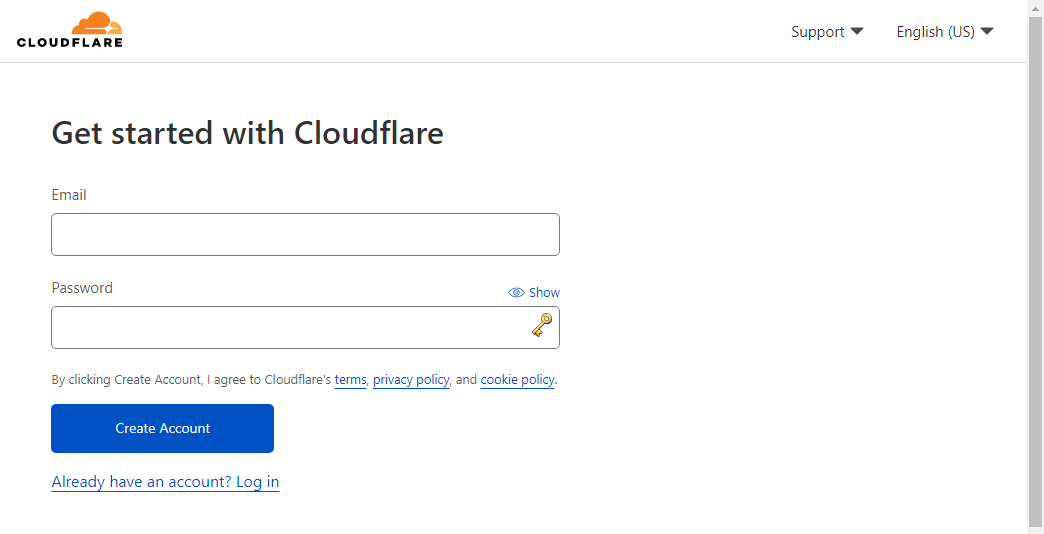
Just enter your email and set a new password and then check your inbox to verify your registration.

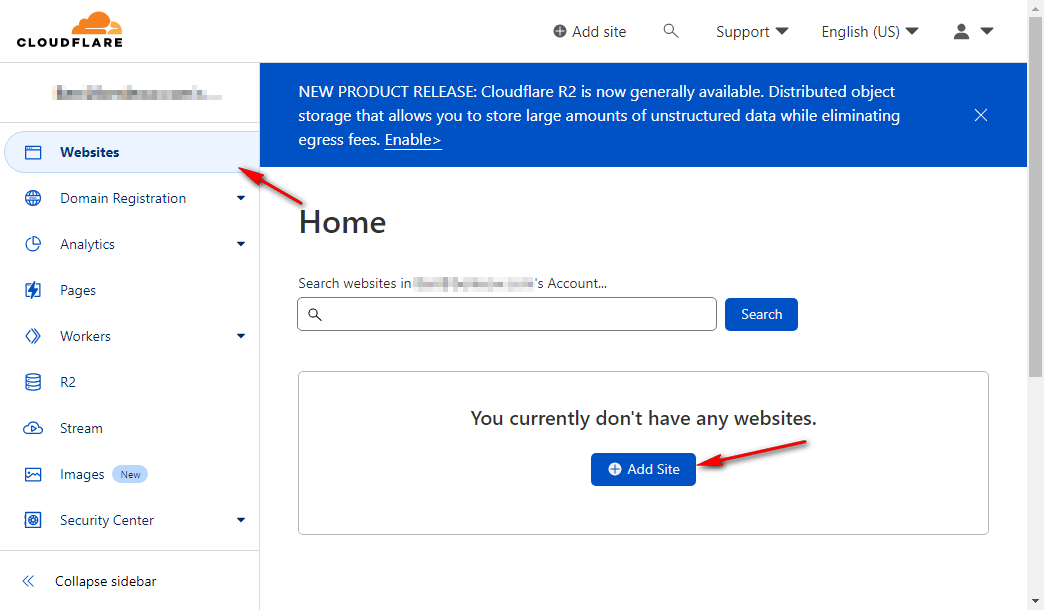
3. Add your domain name into Cloudflare
Once you are in your Cloudflare dashboard, go to Websites and click on Add a Site button.
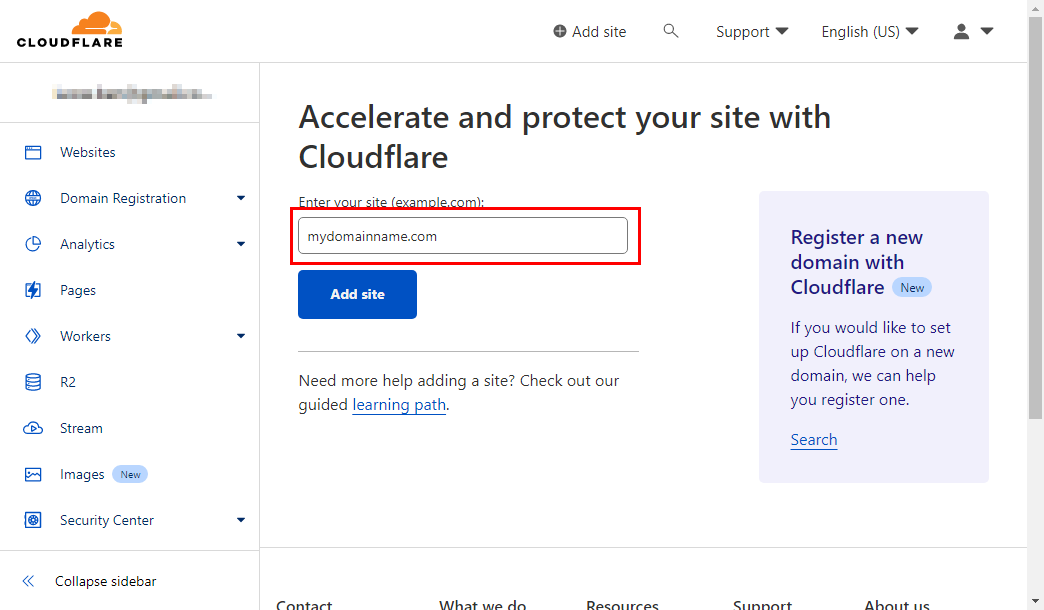
Next, enter the domain name in the field and click Add site.
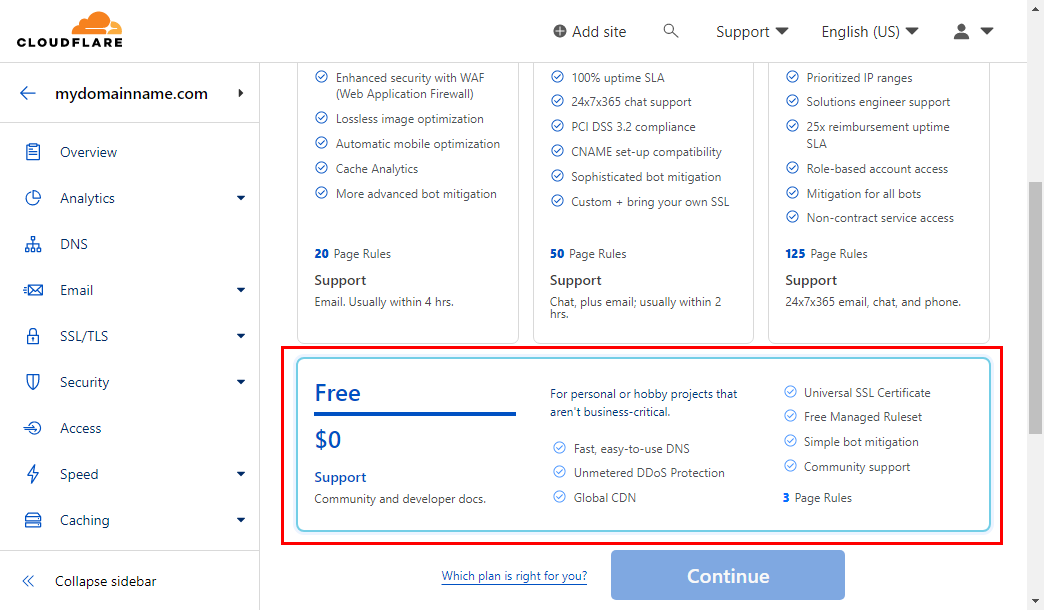
In the Plan selection page, scroll down until you see the Free plan. Select it and click Continue.
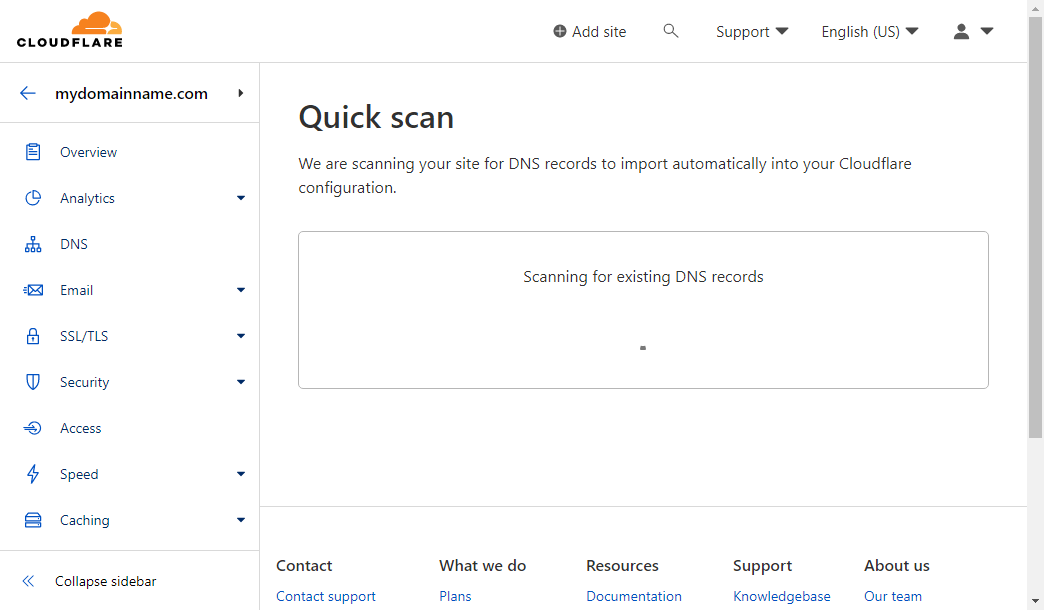
It will perform a DNS scan to find out all the existing DNS records in your domain name. Since this is a new domain name, you can ignore it and click Continue at the bottom.
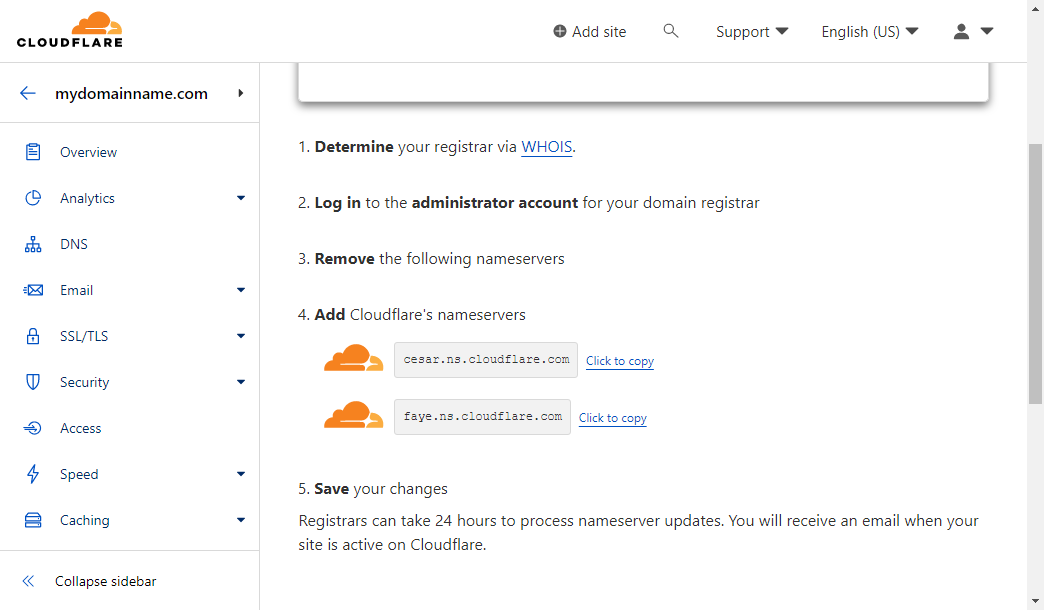
Next, it will ask you to change your domain nameservers to the one given by Cloudflare. So, go ahead and use the given nameservers for your domain name. If you are not sure how to change the domain's nameservers, please get help from the domain registrar or the company you register the domain name.
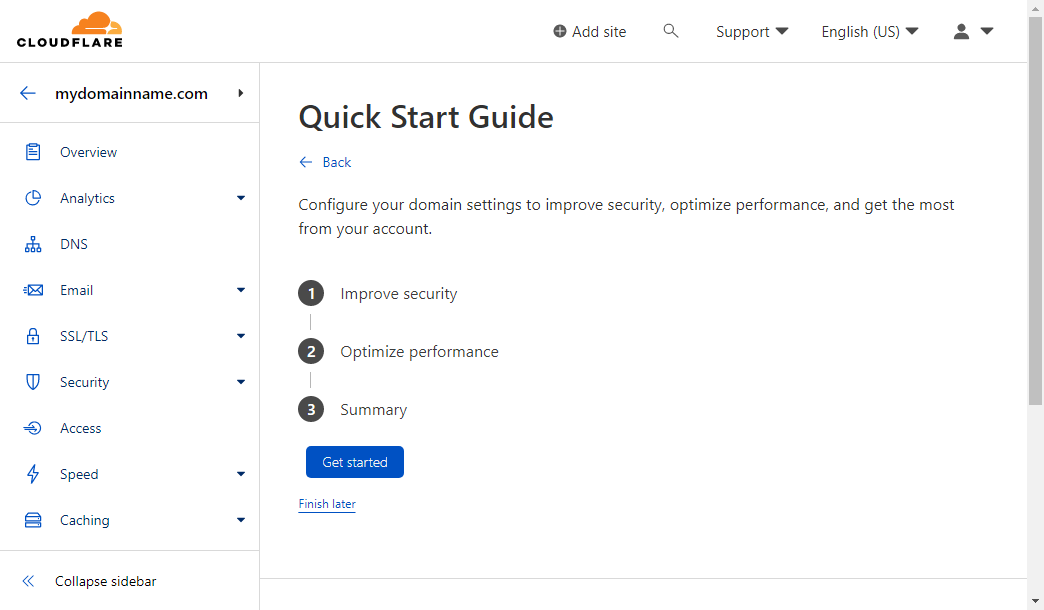
Once you have changed the domain's nameservers with the domain registrar, click on the "Done, check nameservers" button. It may take a few hours to 1 day for the changes to take effect. Once you click the button, it will take you to the Quick Start Guide. You can ignore this and click on the "Finish later" link.
4. Create tunnel in Cloudflare Zero Trust
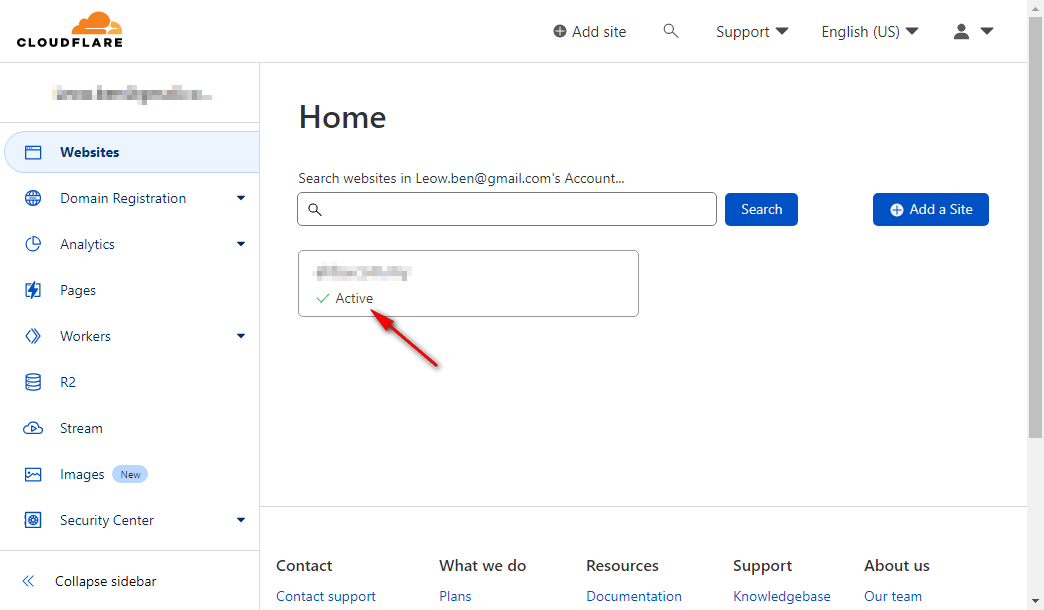
After added your domain name to Cloudflare, go back to the Dashboard and wait for the DNS changes to take effect. Once it is ready, you will see a green tick + Active under the domain name.
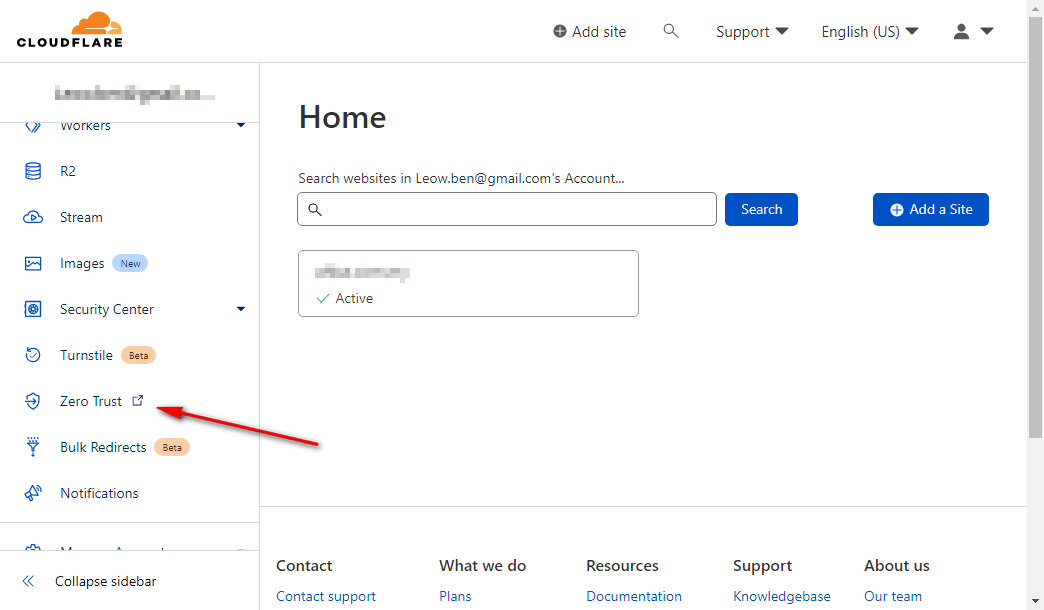
Next, go to Zero Trust page.
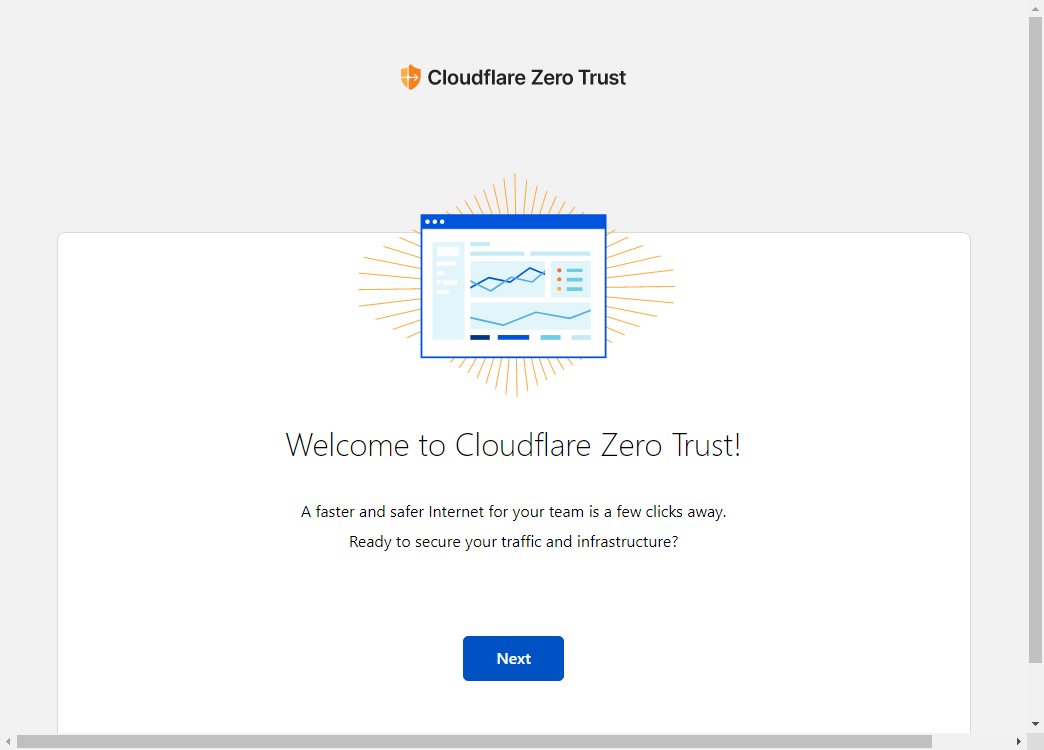
It will start the onboarding process if this is the first time you open it.
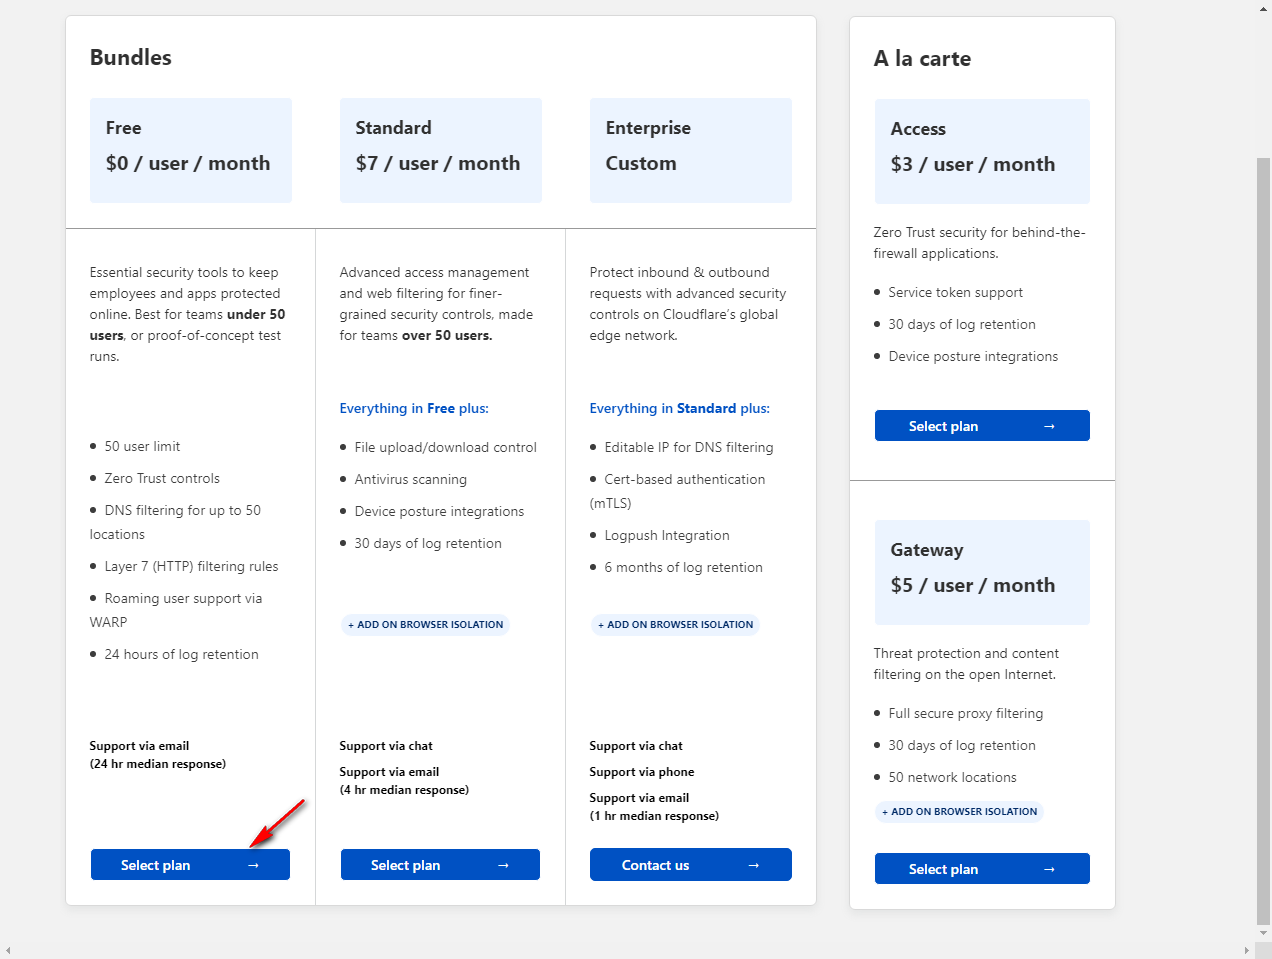
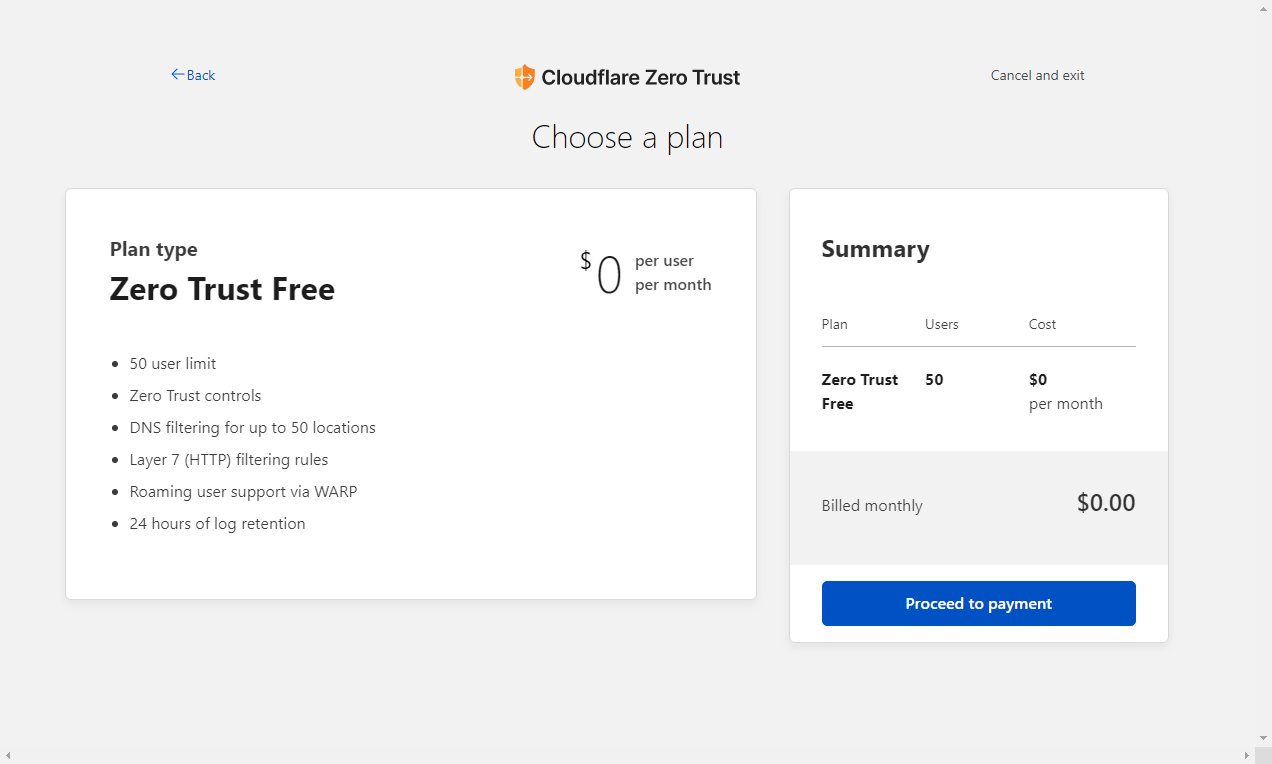
Next, you need to create the team domain. Enter a unique name and click next. After that, select the Free plan. You cannot skip this part. You must select a Plan to proceed.
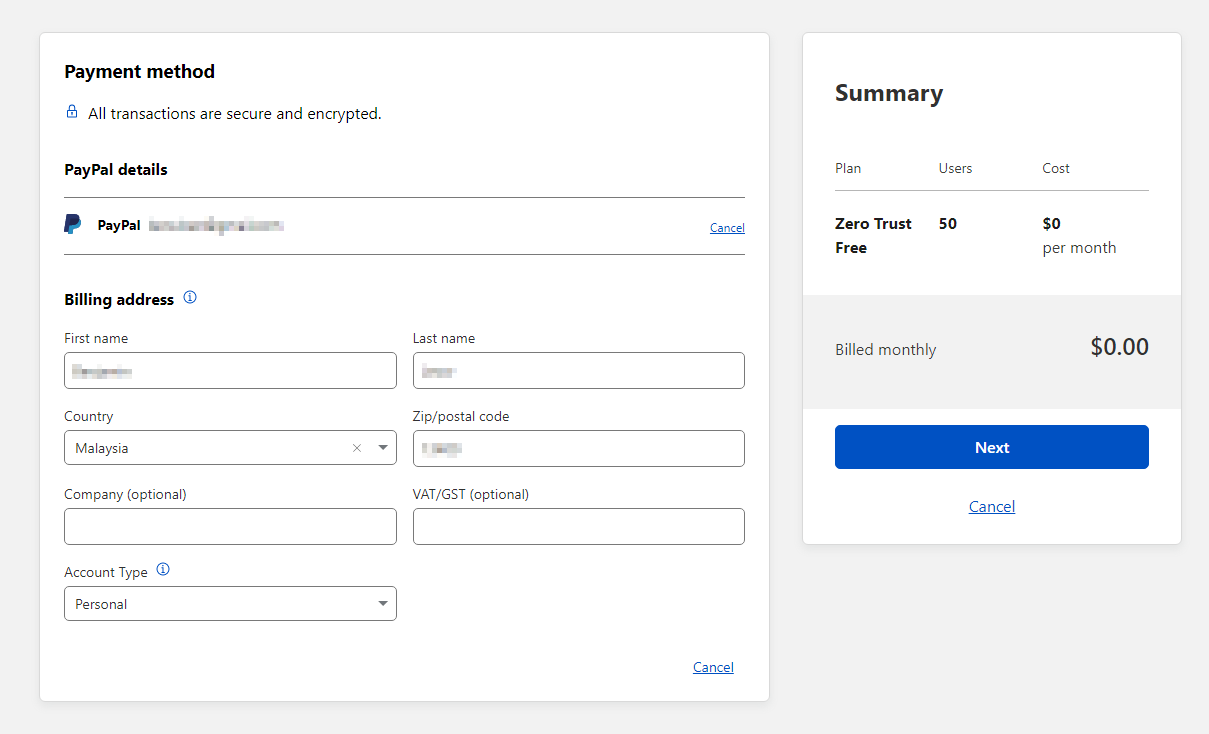
Next, you need to enter your payment method. You can choose between a credit card or PayPal. Don't worry, you won't be charged a single cent if you choose the Free plan. Also, you need to enter your billing address.
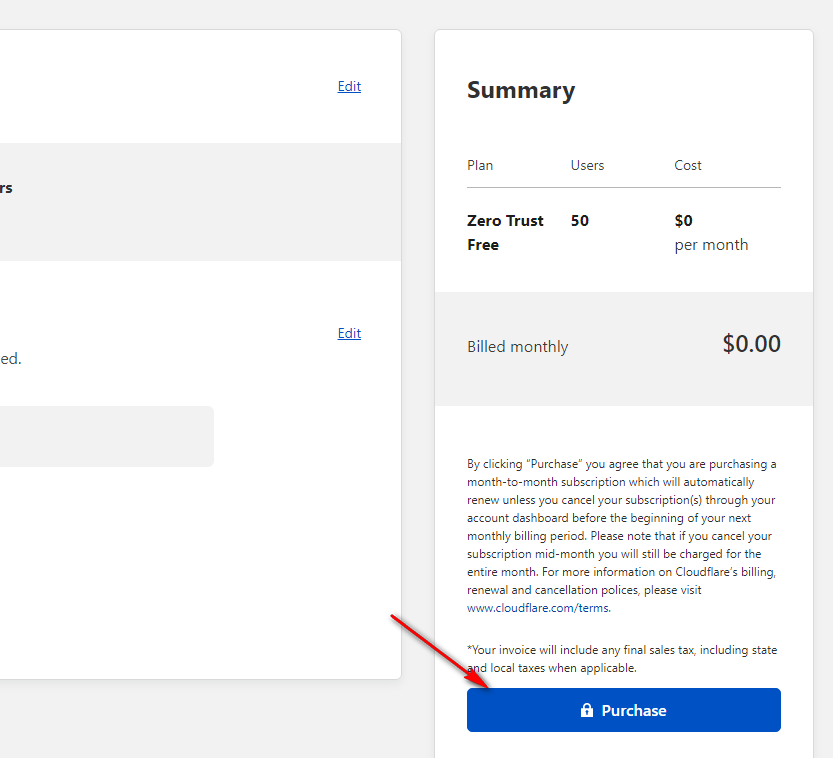
Click purchase to complete the process.
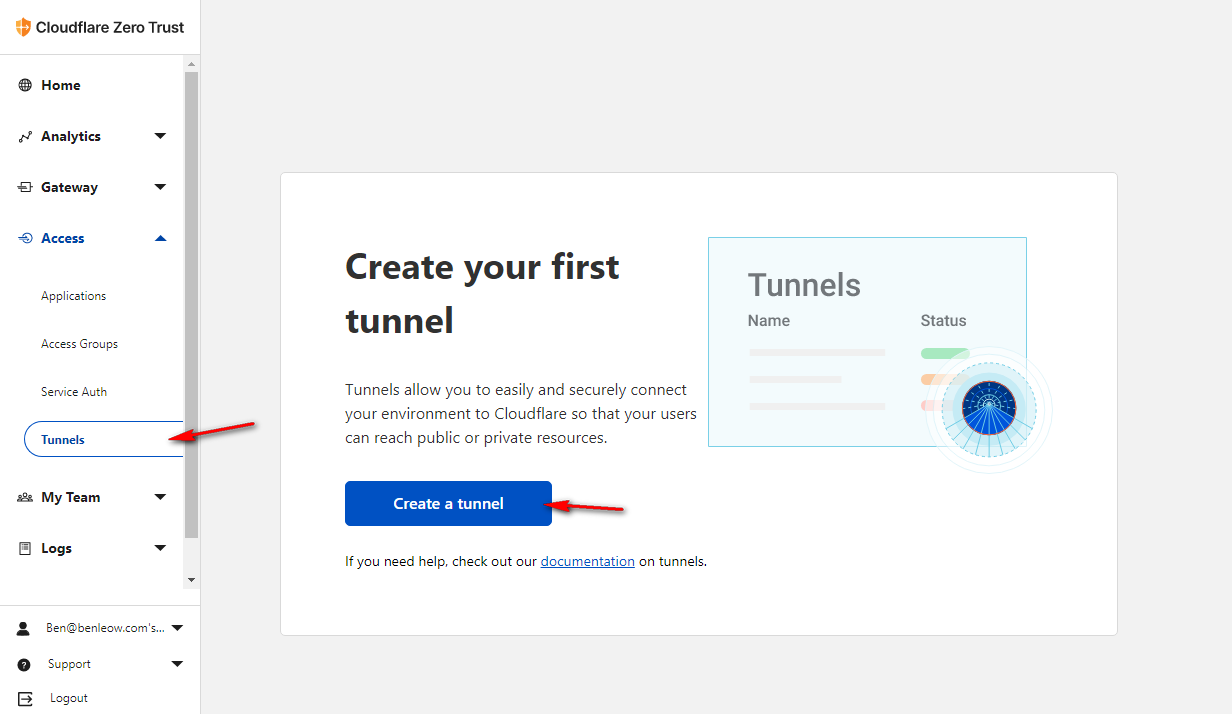
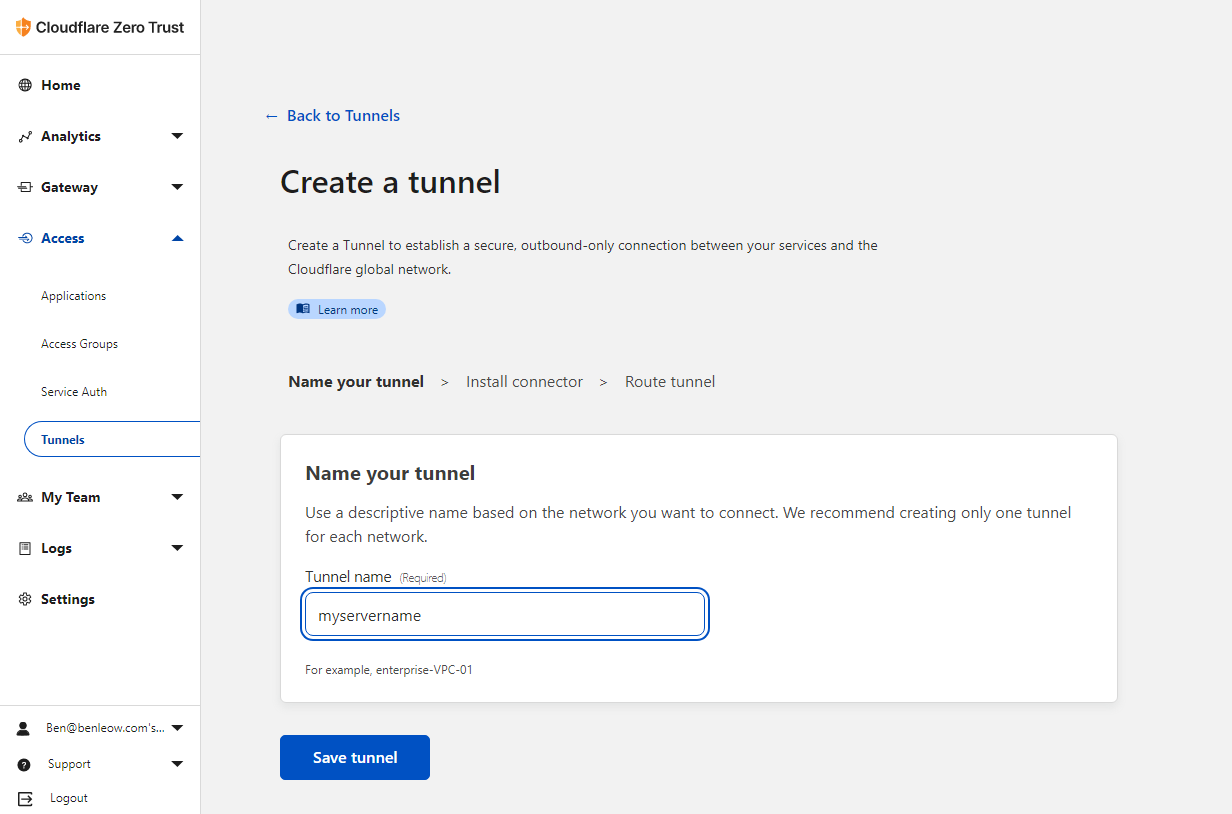
Now you are ready to create your first tunnel. Just go to Access > Tunnels and click on the "Create a tunnel" button.
Next, give your tunnel a name.
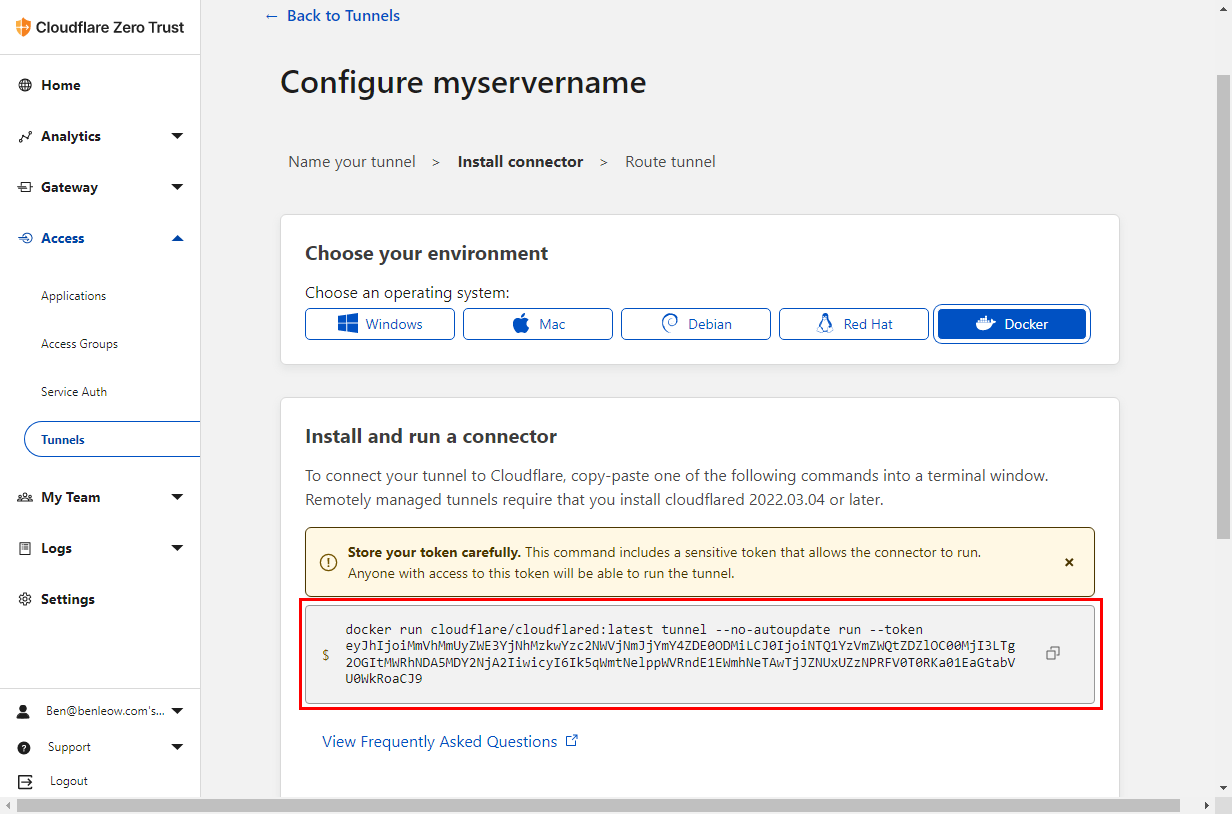
Finally, select Docker and copy the docker command into a save place. We need this in the next step. Now you are done with the Zero Trust setup process.
5. Install Cloudflared Docker in your Synology
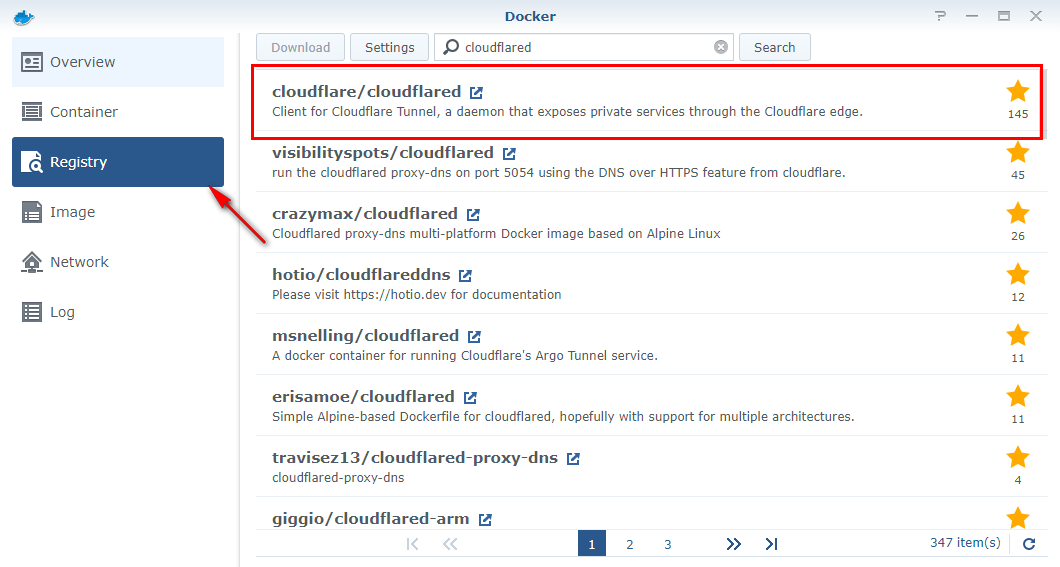
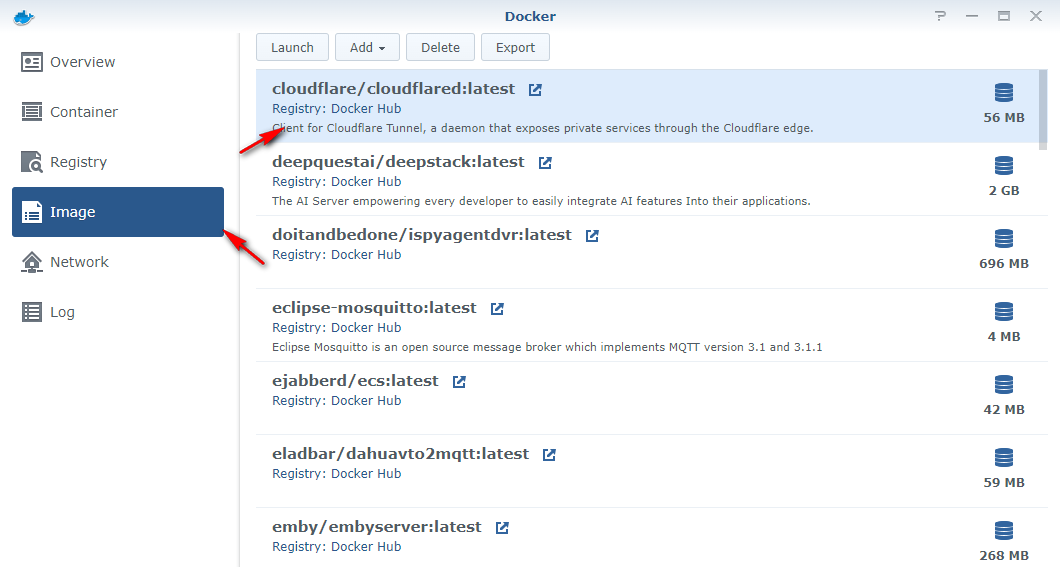
Now login to your Synology DSM and go to Docker. Go to the Registry tab and search for "cloudflared". Download the first result.
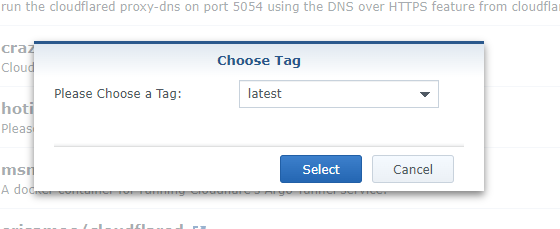
Once the download is complete, it will appear in the Image tab. Select it and click Launch.
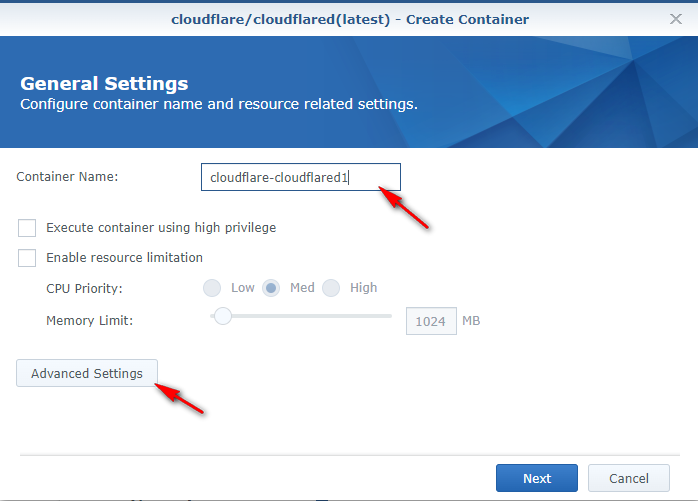
Now go to the Environment tab and copy and paste the Docker command we got from the Zero Trust page above into the Command field under the Execution Command section but you have to remove the first part of the command "docker run cloudflare/cloudflared:latest".
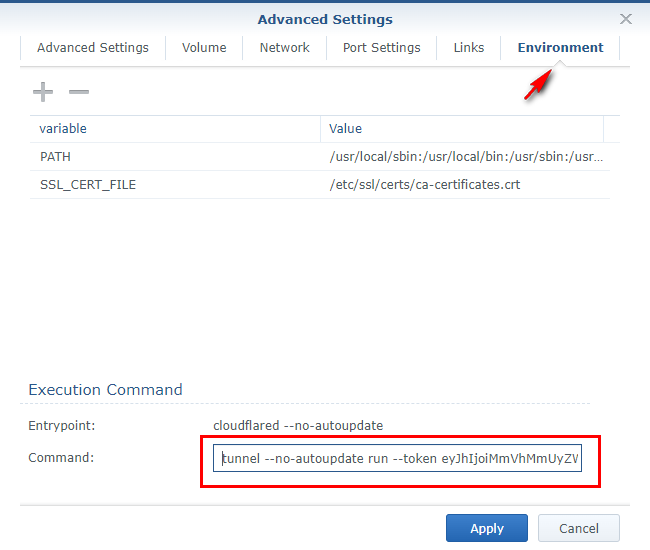
Click Apply and Next. Finally click Apply one more time to launch the container.

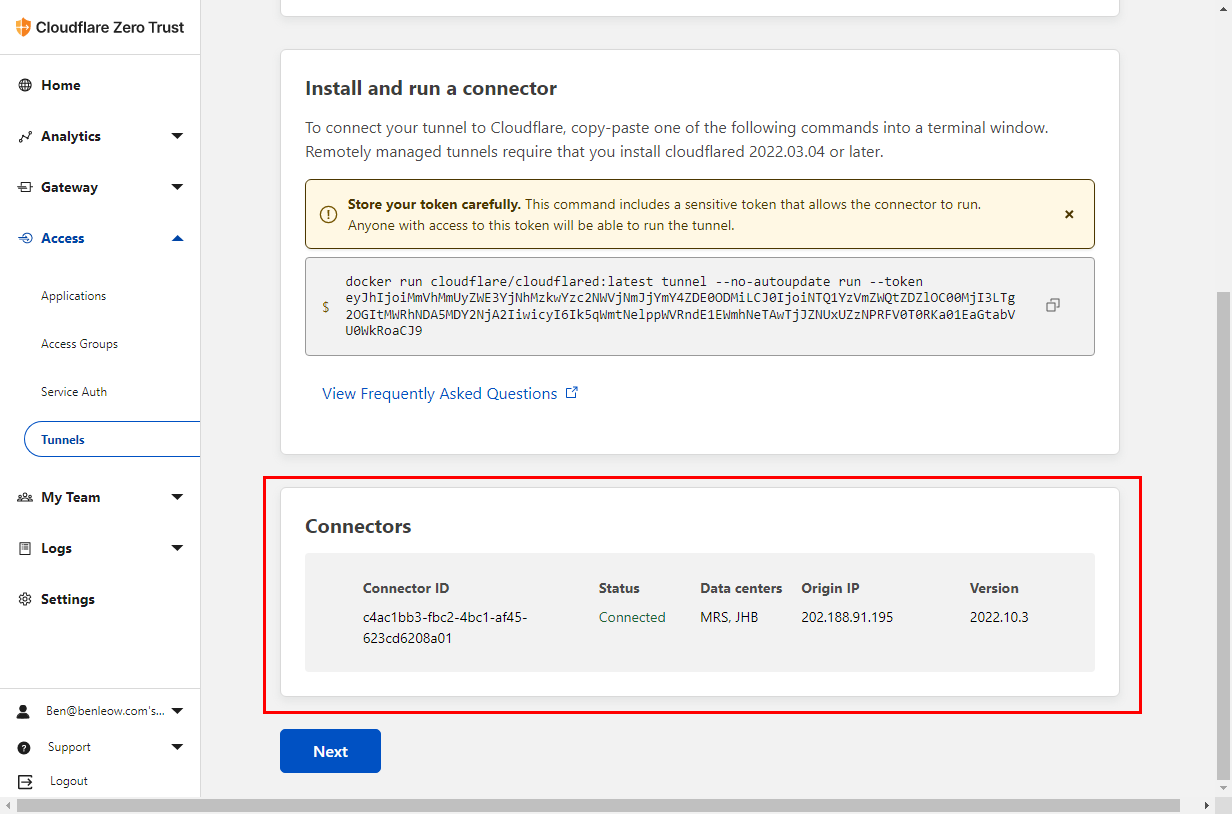
Few seconds later, your connection should appear under Connectors in Zero Trust page above.
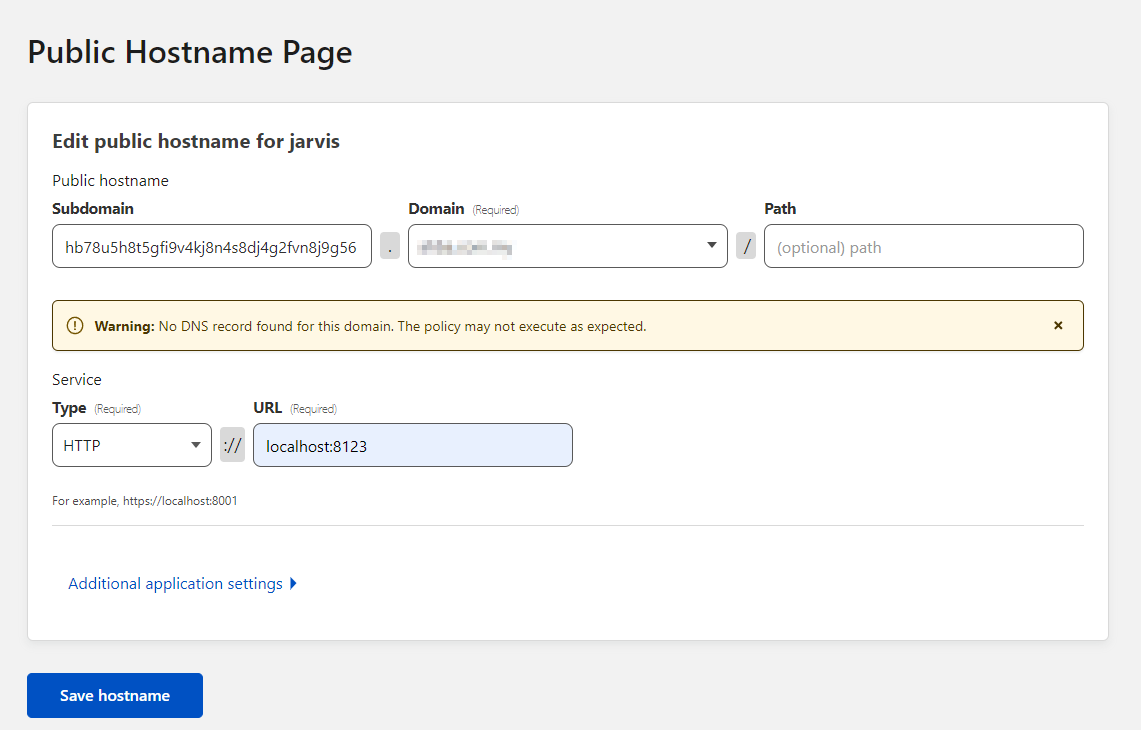
6. Setup public hostname for your Home Assistant
Now you can create the public hostname (i.e. the external URL) for your Home Assistant. I prefer to use a long random character for the subdomain as security through obscurity. Other than that, select your domain from the list and leave the path empty. Under service, for Type select HTTP and URL enter the internal URL of your Home Assistant. Since the cloudflared docker and Home Assistant docker are running in the same server, then I just enter localhost:8123 as the address.
After you save the hostname, you can now go to your newly created external URL of your Home Assistant; https://[subdomain].[domain]. However you will not see the Home Assistant login page. Instead you will see ERROR 400 on the page. To fix that, we have go to the next step.
7. Configure configuration.yaml file in Home Assistant
Now you have to edit your Home Assistant's configuration.yaml file to add these lines into it...
http:
  use_x_forwarded_for: true
  trusted_proxies:
    - ::1
However, if this is not working for you, you need to see the log to find out which IP was being block from accessing your Home Assistant.
After that, save your configuration.yaml file and restart your Home Assistant. Once it is restarted, you can now revisit the external URL for your Home Assistant and you should be greeted with the login page.
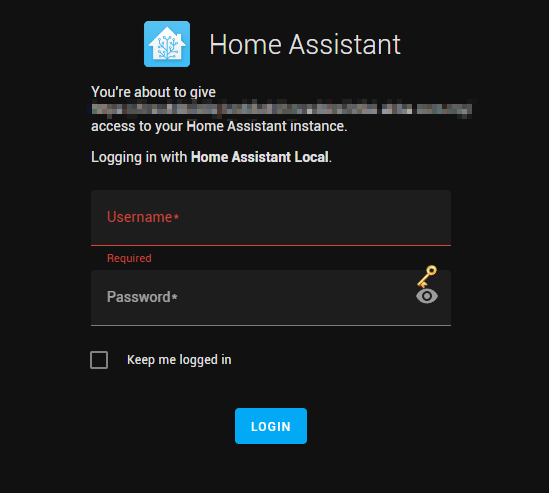
At this point, you have successfully enabled access to your Home Assistant from outside. Well done!
Comments