How to install Zigbee2MQTT using Portainer
Introduction
Zigbee2MQTT (Z2M) is an open source software that connects your Zigbee devices to your smart home system (in my case Home Assistant) using MQTT. There are multiple methods to install Z2M and the method I prefer is to install it as a standalone application in a Raspberry Pi using Docker. However, the guide to install Z2M using Docker may look quite intimidating for beginners. Luckily there is an application known as Portainer that provides web user interface for you to manage your Docker so that you don't have to memorize all the commands for SSH. Let me show you how to install Z2M using Portainer.
What you need
These are the hardware I am using for this guide...

- SONOFF Zigbee 3.0 USB Dongle Plus.
- Raspberry Pi 3 Model B and its accessories like casing, power supply and 8GB MicroSD card.
- Optional: USB extension cable
Other than the above hardware, I already have Home Assistant and Mosquitto MQTT broker running in another machine.
Install Portainer
Assuming your Raspberry Pi is already up and running using at least Raspberry Pi OS Lite with SSH access, all you need to do now is to install Portainer.
There is already an excellent video guide on how to do that...
Basically, these are what you need to do...
- SSH into your Pi using PuTTY.
- Update your Pi:
sudo apt update - Upgrade your Pi:
sudo apt upgrade -y - Install Docker:
curl -sSL https://get docker.com | sh - Confirm Docker is installed:
docker - Add Pi user to Docker:
sudo usermod -aG docker pi - Download Portainer image:
sudo docker pull portainer/portainer-ce:linux-arm - Launch Portainer docker:
sudo docker run -d -p 9000:9000 --name=portainer --restart=always -v /var/run/docker.sock:/var/run/docker.sock -v portainer_data:/data --log-opt max-size=10m --log-opt max-file=5 portainer/portainer-ce:linux-arm - Launch your web browser and go to http://[YOUR PI IP]:9000
- Create your user account and login.
- Portainer installation is done!
Install Zigbee2MQTT using Portainer
It's time to install Zigbee2MQTT using Portainer. But before that, let's prepare a couple of things first.
Set Persistent Name for the Adapter
Sometime, the adapter name (location) may change if you unplug the adapter and plug it again. It is better to set a persistent name for the adapter. Here is how you do it.
First, plug in the SONOFF Zigbee 3.0 USB Dongle Plus adapter and list all USB devices: lsusb
pi@zigbee2mqtt:/etc/udev/rules.d $ lsusb
Bus 001 Device 005: ID 10c4:ea60 Cygnal Integrated Products, Inc. CP2102/CP2109 UART Bridge Controller [CP210x family]
Bus 001 Device 004: ID 0658:0200 Sigma Designs, Inc. Aeotec Z-Stick Gen5 (ZW090) - UZB
Bus 001 Device 003: ID 0424:ec00 Standard Microsystems Corp. SMSC9512/9514 Fast Ethernet Adapter
Bus 001 Device 002: ID 0424:9514 Standard Microsystems Corp. SMC9514 Hub
Bus 001 Device 001: ID 1d6b:0002 Linux Foundation 2.0 root hub
In this case, the ID for adapter is "10c4:ea60". Please take note of this ID.
Next, create this file: sudo nano /etc/udev/rules.d/99-usb-serial.rules and then enter this line into it...
SUBSYSTEM=="tty", ATTRS{idVendor}=="10c4", ATTRS{idProduct}=="ea60", SYMLINK+="zigbee"Note the idVendor and idProduct are the value gotten from above step. "zigbee" is the persistent name that you want it to be.
Reboot the Pi: sudo reboot
To test, unplug the adapter and plug it back. Then execute this: ls -l /dev/zigbee. It should show this result...
lrwxrwxrwx 1 root root 7 Mar 30 11:28 /dev/zigbee -> ttyUSB0Prepare Initial Configuration File
Now you need to prepare the initial configuration file.
- Change directory to "home/pi":
cd - Create a data directory for Z2M:
mkdir -p zigbee2mqtt/data - Change directory to zigbee2mqtt:
cd zigbee2mqtt - Download the default configuration file:
wget https://raw.githubusercontent.com/Koenkk/zigbee2mqtt/master/data/configuration.yaml -P data - Edit the configuration file:
nano data/configuration.yaml - Change the MQTT server address (my broker is located in another machine), uncomment the user and password (if you have set them) and change the serial port to /dev/ttyUSB0. I also added...
advanced:
  network_key: GENERATE
frontend:
  port: 8080
The initial configuration file will end up looking something like this...
# Home Assistant integration (MQTT discovery)
homeassistant: false
# allow new devices to join
permit_join: true
# MQTT settings
mqtt:
  # MQTT base topic for zigbee2mqtt MQTT messages
  base_topic: zigbee2mqtt
  # MQTT server URL
  server: mqtt://192.168.1.123
  # MQTT server authentication, uncomment if required:
  user: USERNAME
  password: PASSWORD
# Serial settings
serial:
  # Location of CC2531 USB sniffer
  port: /dev/ttyUSB0
advanced:
  network_key: GENERATE
frontend:
  port: 8080
Now that it's done, you can proceed with the Z2M installation process in Portainer.
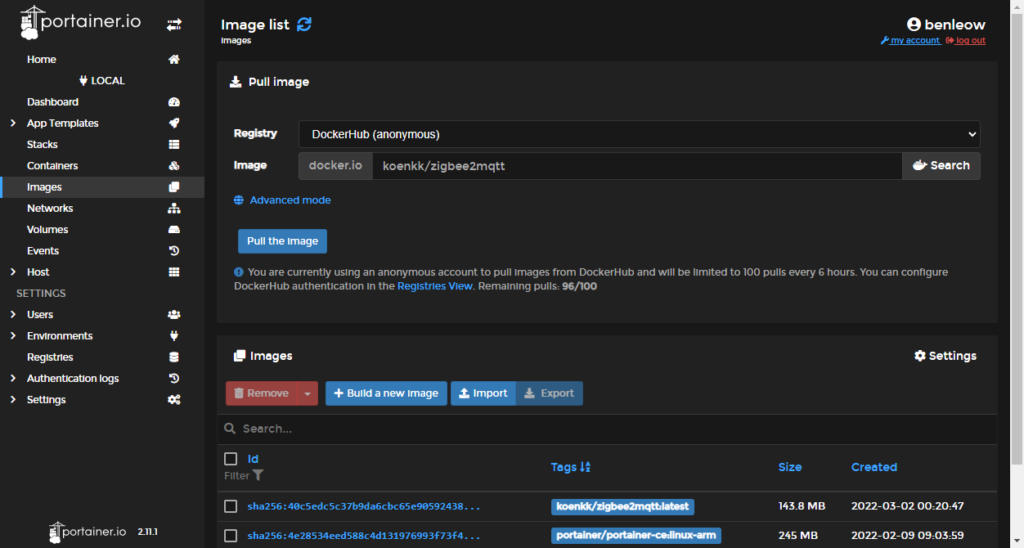
Go to your Portainer web UI at http://[YOUR PI IP]:9000 and then go to Images. Key in "koenkk/zigbee2mqtt" in Image docker.io field and click "Pull the Image" button. It will take few minutes to download the image file.
After the image is downloaded, go to Containers > Add container and fill in the fields like this...
- Name: Zigbee2MQTT
- Image: docker.io koenkk/zigbee2mqtt:latest
- Publish a new network port: host:8080 -> container:8080
Go to Advanced container settings section. Under Command & logging tab, change the following values to limit the log size...
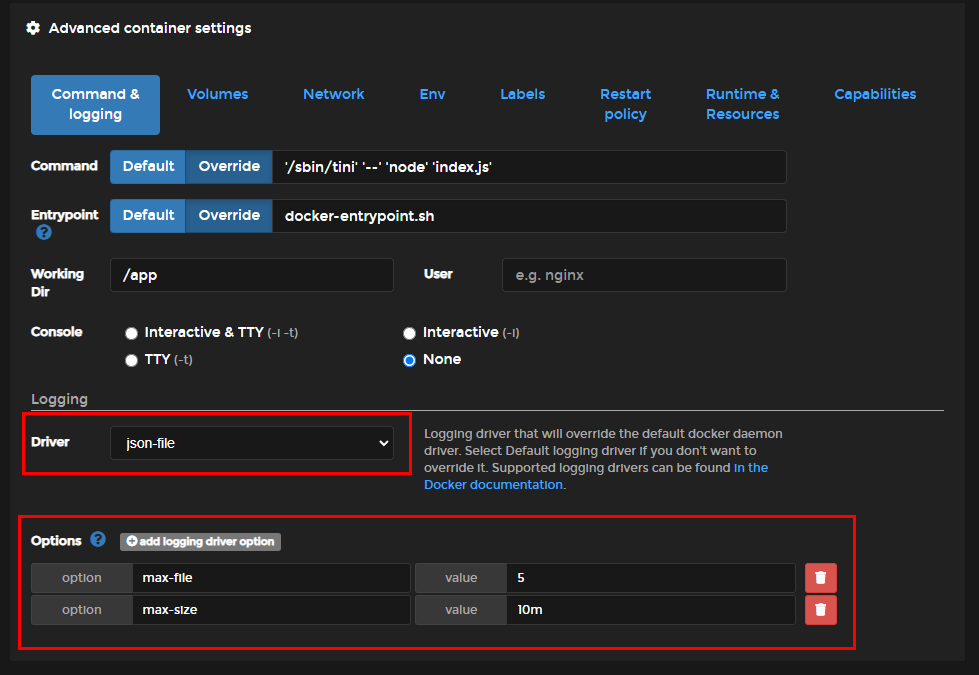
- Driver: json-file
- Options:
- max-file: 5
- max-size: 10m
Under Volumes tab, add the following volume mapping...
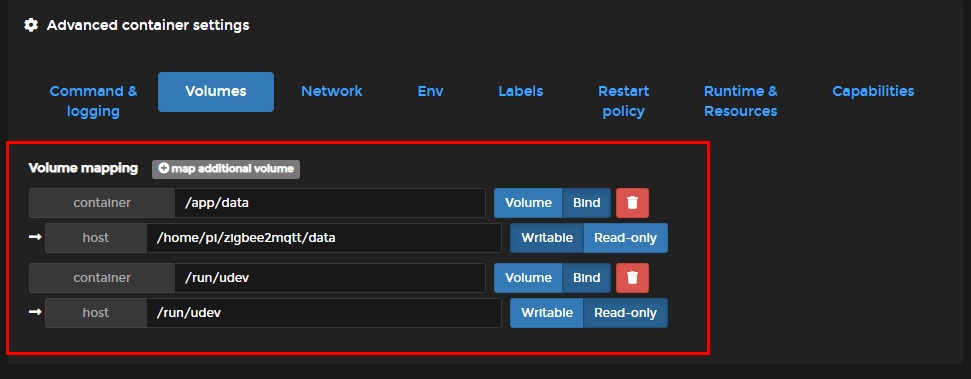
- /app/data -> /home/pi/zigbee2mqtt/data
- /run/udev -> /run/udev (Read-only)
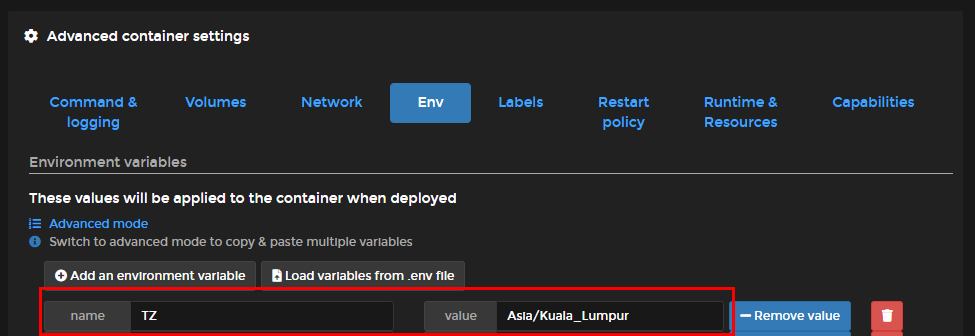
Under Env tab, add your timezone...
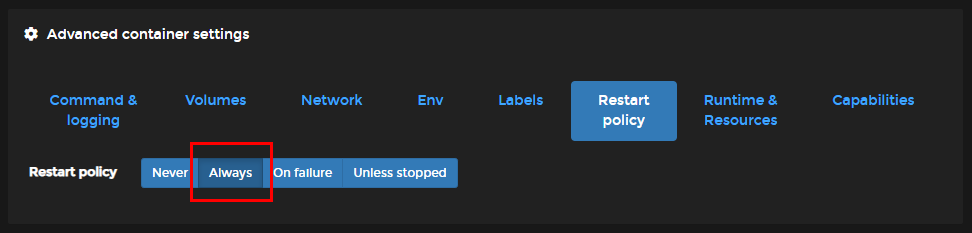
Under Restart policy tab, change to Always...
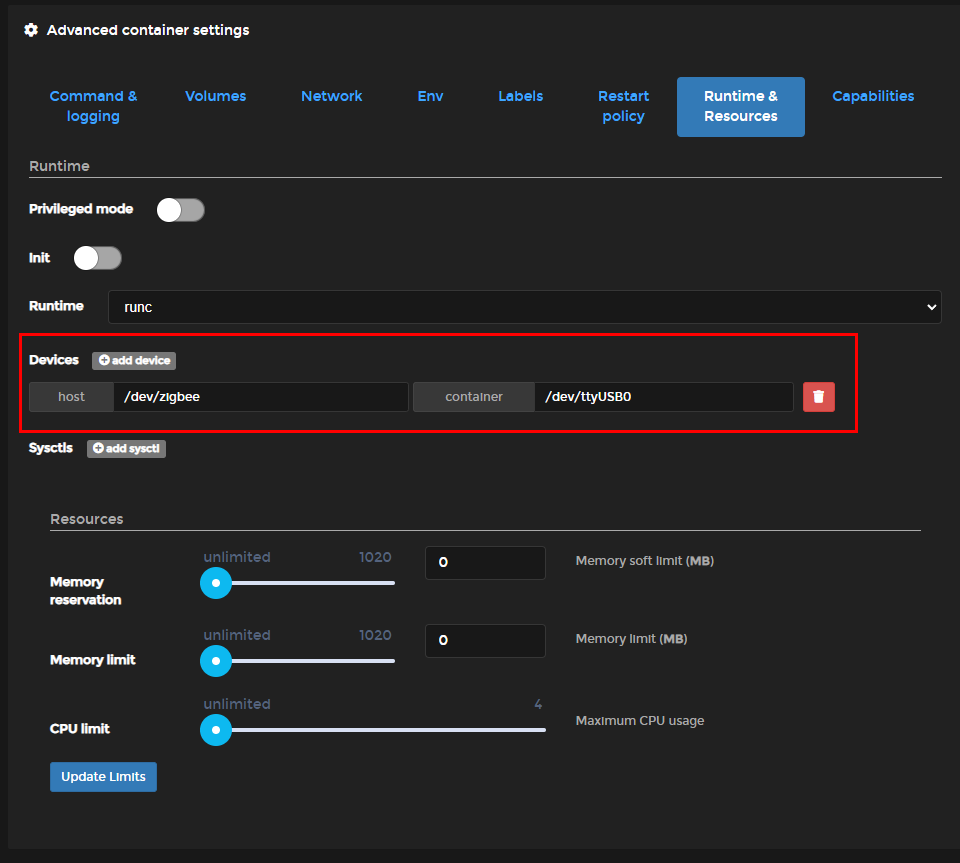
Under Runtime & Resources tab, click add device and enter the persistent name set for the adapter (/dev/zigbee. see above) in the host field and then /dev/ttyUSB0 in the container field.
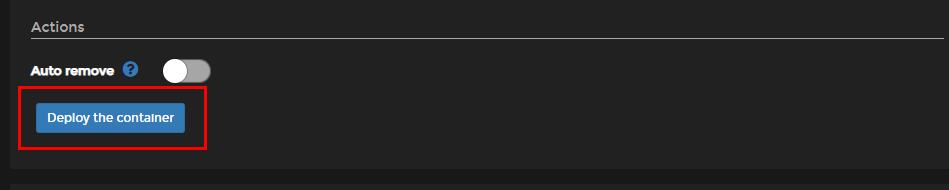
Finally, click on the "Deploy the container" button.
After a couple of minutes, you should be able to load the Zigbee2MQTT web UI at http://[YOUR PI IP]:8080
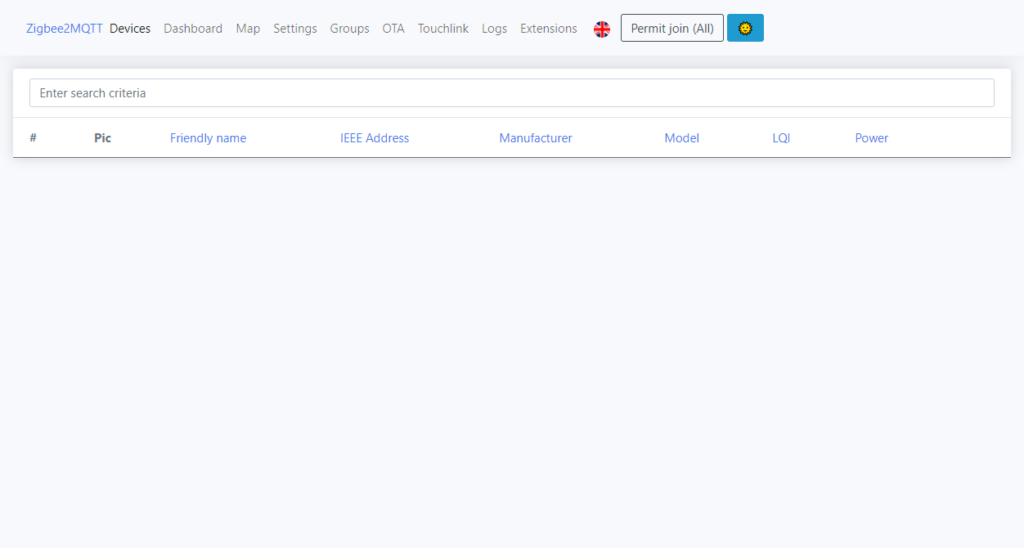
Now you are ready to add your zigbee devices using this web UI.

Comments